Chapter 1: An Overview
Learning Objectives
- Create a workbook.
- Identify a cell reference.
- Add and edit content.
- Save a workbook.
Microsoft Excel, or simply Excel is an application software within the Microsoft 365 suite. You can buy the Microsoft 365 suite with a yearly or monthly subscription. Excel is known for its ability to perform numerical calculations and create charts. Other uses of Excel include organising data, manipulating text, and creating graphical dashboards, to name a few. The meaningful information produced by Excel can be used to make both personal and business decision makings. You can use Excel to record your expenses, to make a budget, or to calculate how much you should save for your retirement days. Businesses can use Excel to calculate total sales, keep track of product stocks, and produce profit and loss statements.
This is an Excel logo from 2019 until the Microsoft 365 version.

Let’s get started.
Click an Excel button on your computer to launch the application. The first screen you get when you open Excel is called a start screen.
See the Figure below.
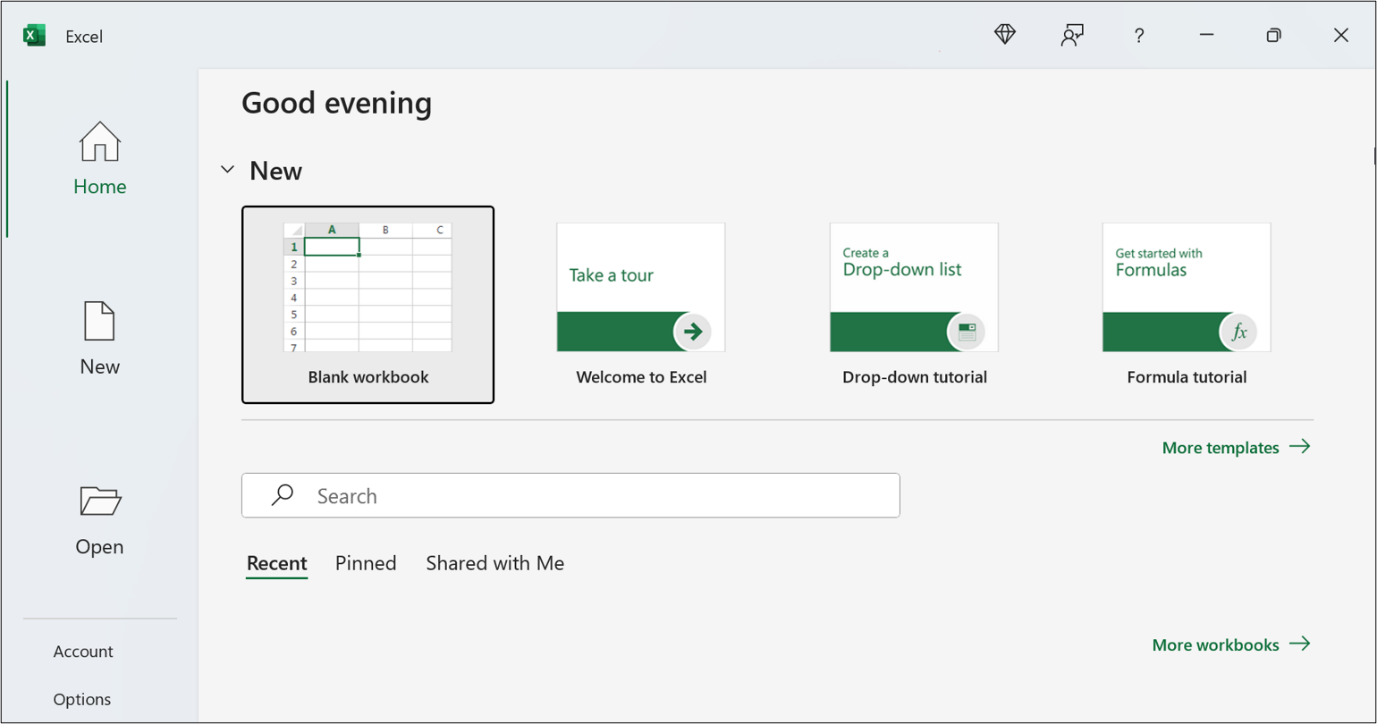
An Excel file is called a workbook, with the file extension, .xlsx.
Click ‘Blank Workbook’ to create a workbook.
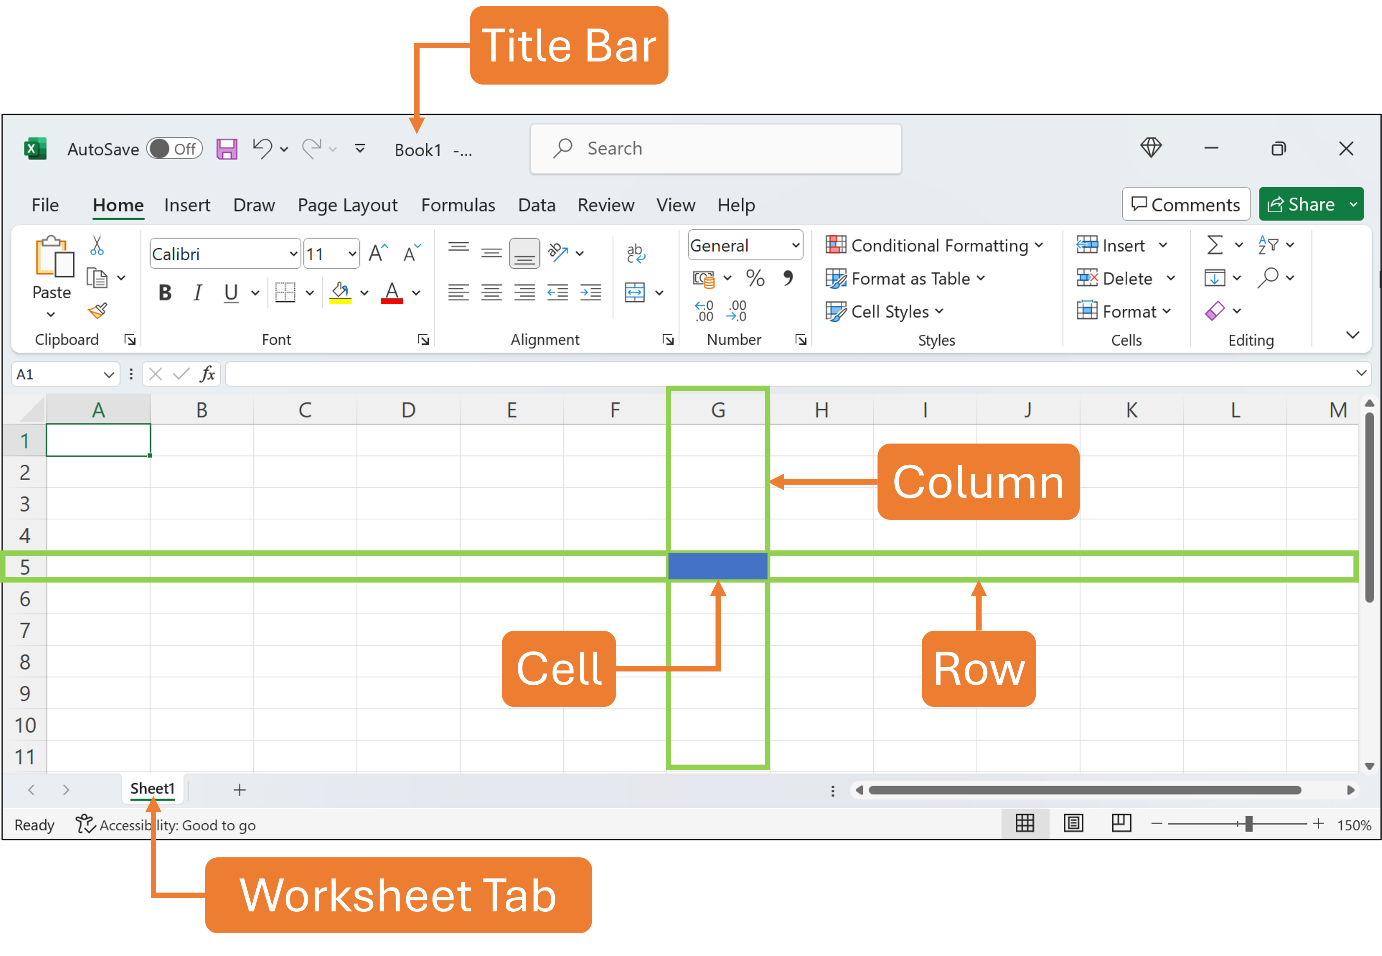
When you create a blank workbook, Excel presents you with a blank worksheet. You can have many worksheets inside one workbook. A worksheet is made up of columns, which are positioned vertically, and rows, which are placed horizontally. The columns are indicated by letters at the top of each column as A, B, C, etc. called column headings. The rows are indicated by the numbers of each row at the left as 1, 2, 3, etc. called row headings. The intersection between a column and a row defines a cell and its location. The location of a cell is referred to as a cell address or a cell reference. For example, if column G intersects with row 5, the cell reference is G5.
Excel will assign a default file name to the blank workbook such as Book1 in the Title Bar, in which later you need to save it in your hard drive using your preferred file name. The default name for the worksheet is Sheet1 as shown in the Worksheet Tab, in which later you can rename it, or even add more worksheets in the same workbook.
See the Figure below.
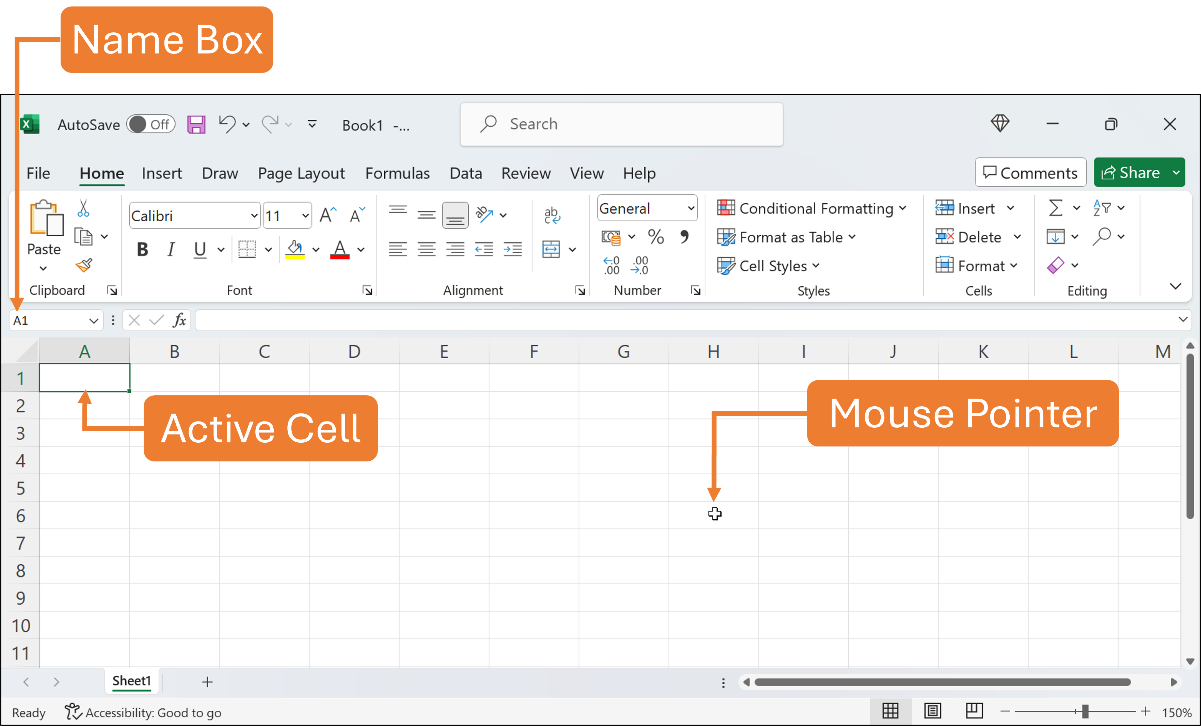
The dark outline indicates the currently selected cell in a worksheet is called an active cell. Only one cell is active at a time. Once you click any cell to make it active, its cell reference appears in the Name Box. For example, if the active cell is cell A1, thus A1 is displayed in the Name Box.
You can observe that the mouse pointer turns into a white plus sign. This is the default mouse pointer shape that allows you to select a single cell by clicking on it. Excel has other mouse pointer shapes that change according to a specific task which you may find later as you with more features.
See the Figure below.
An active cell is ready to accept any content when you begin typing.
Let’s type some contents in the worksheet.
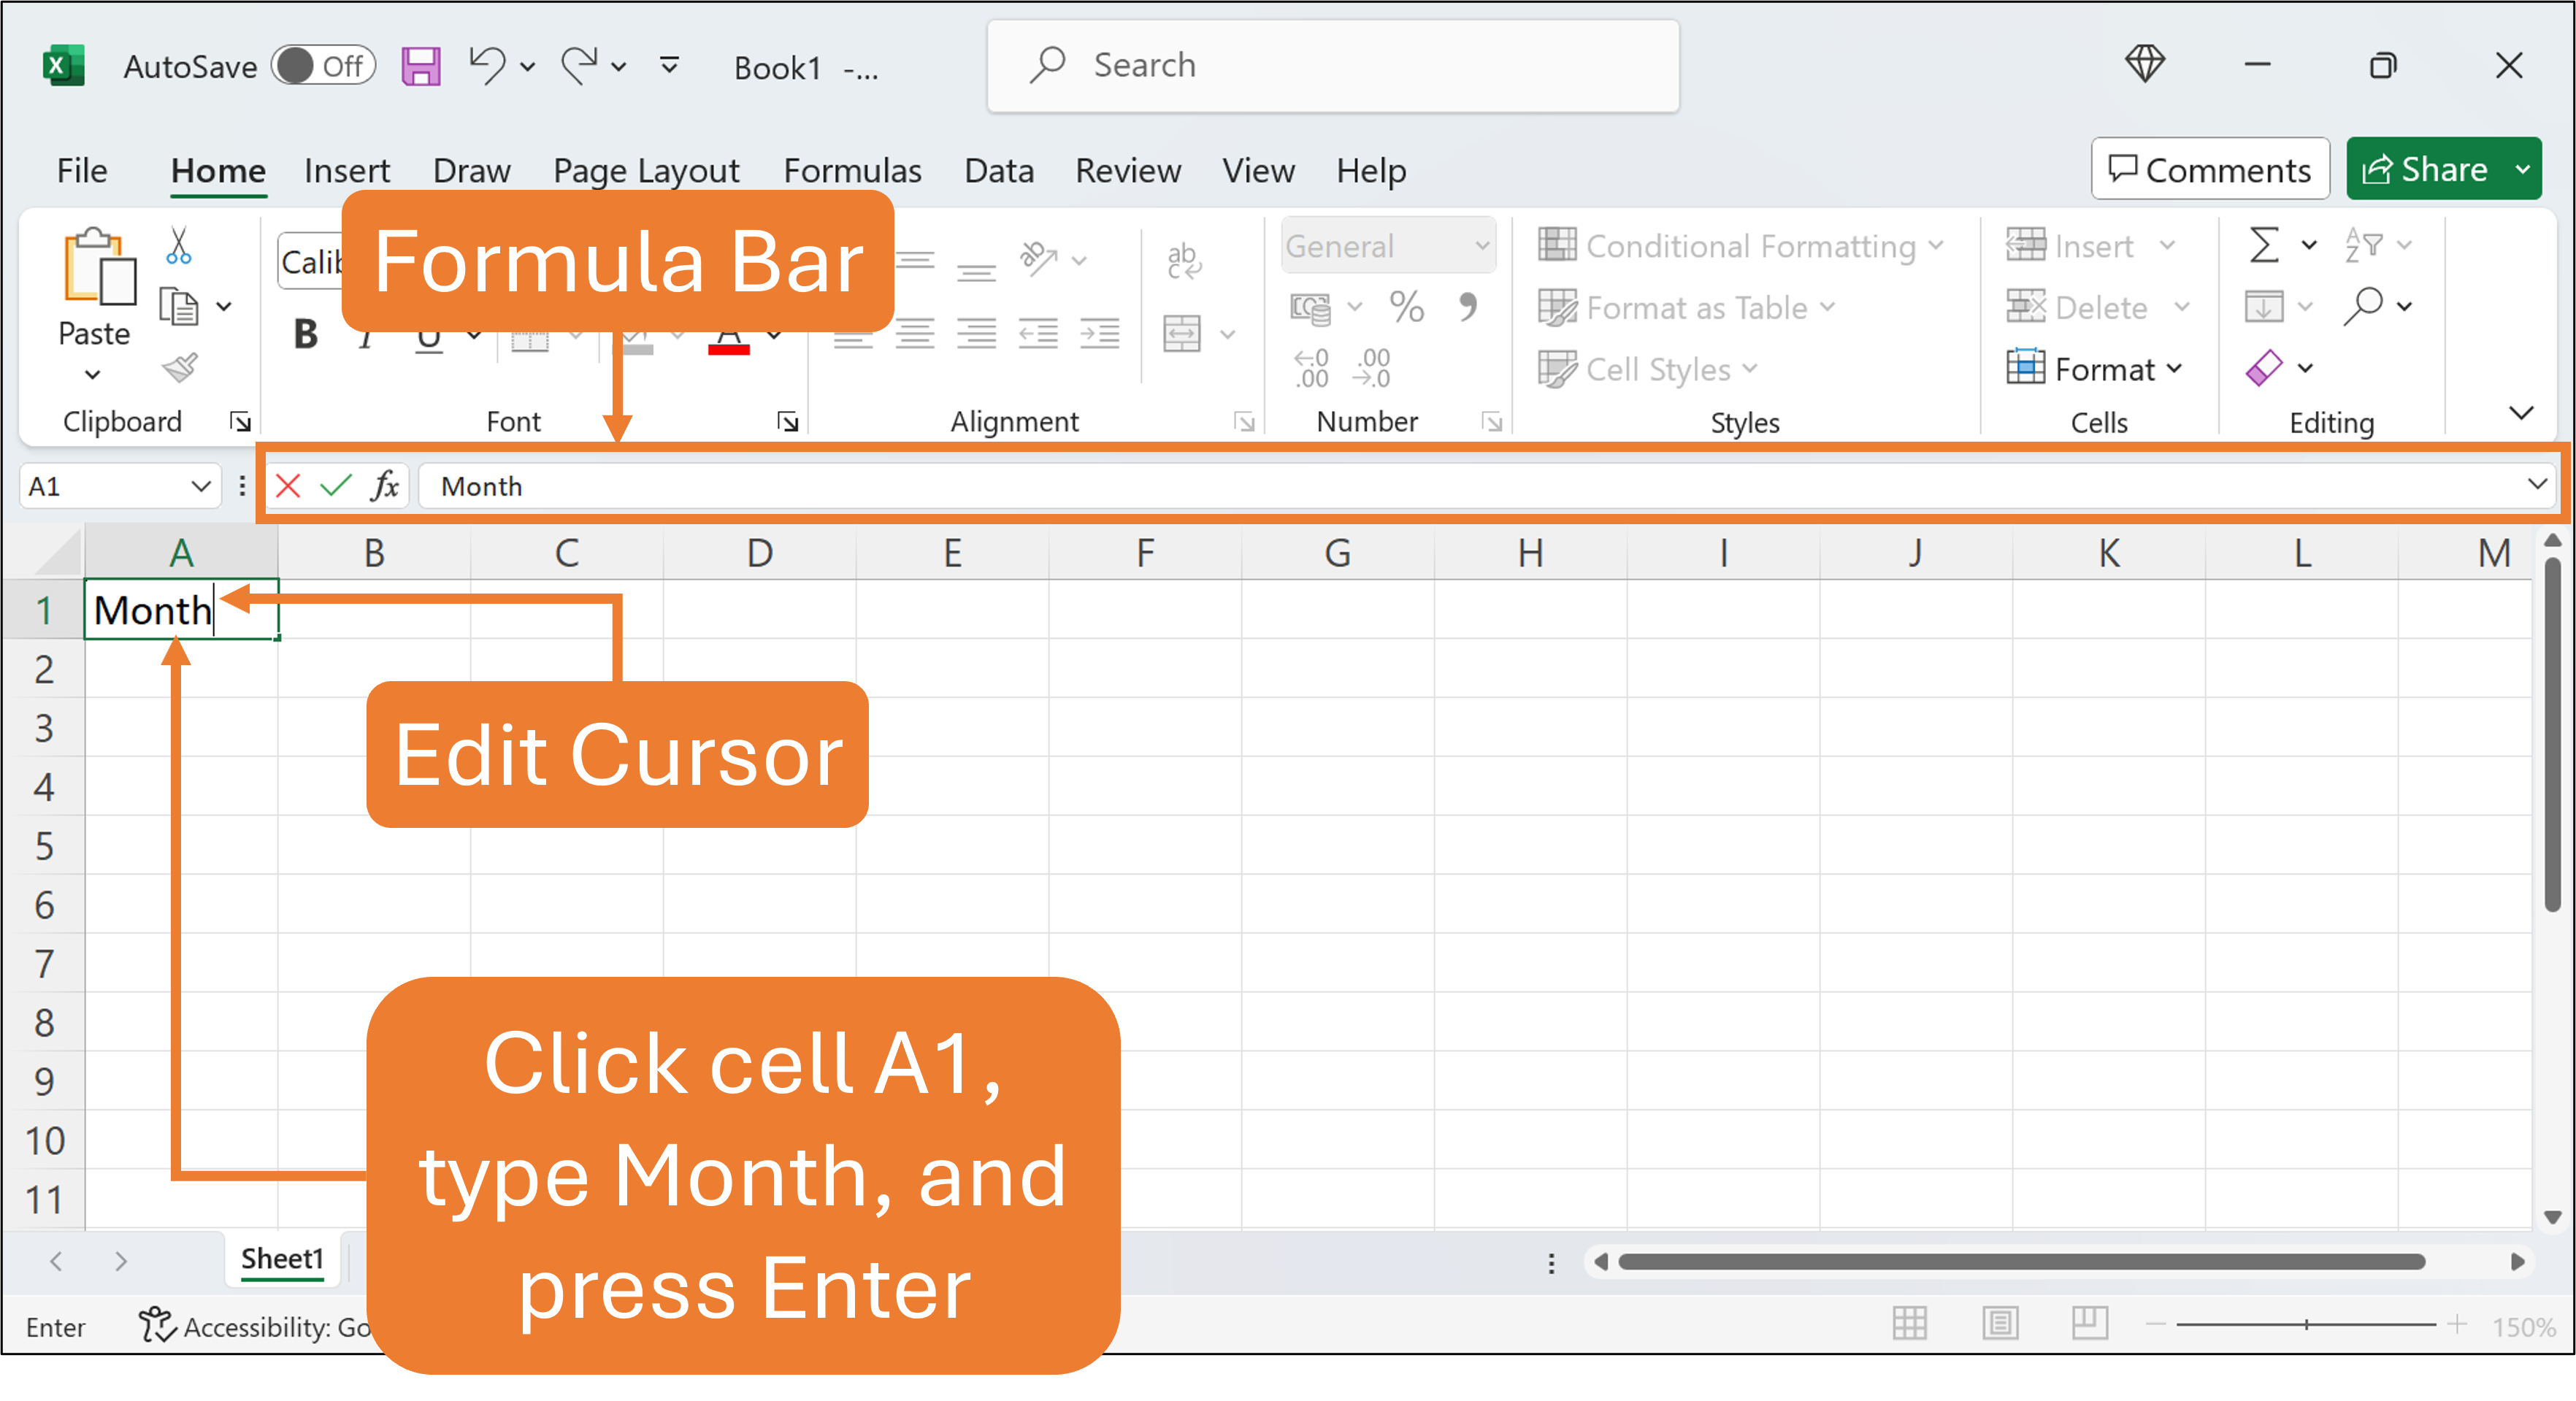
Click cell A1 to make it an active cell. Type Month in cell A1. Once you type content in the cell, you can see that the content appears in the cell, as well as in the Formula Bar.
You can also observe the blinking vertical line in the cell. This is an Edit Cursor; some refer to it as the I-Beam. It indicates the current insertion point within a cell that allows you to enter or edit text directly into the current cell. You can use the Edit Cursor to type or modify the contents of a cell such as text or formula.
See the Figure below.
If you make a mistake at this point, just press Backspace, and retype the correct word. Then, press Enter to save the content in cell A1.

If you make a mistake after the content is saved in the cell, you can edit the cell content by using one of the following ways:
- Double-click the cell to edit the content directly in the cell.
- Select the cell and press F2 to edit the content directly in the cell.
- Select the cell that you want to edit and then click inside the Formula Bar to edit the content in the Formula Bar.
- Click the cell to make it active and type the new content to replace the previous content.
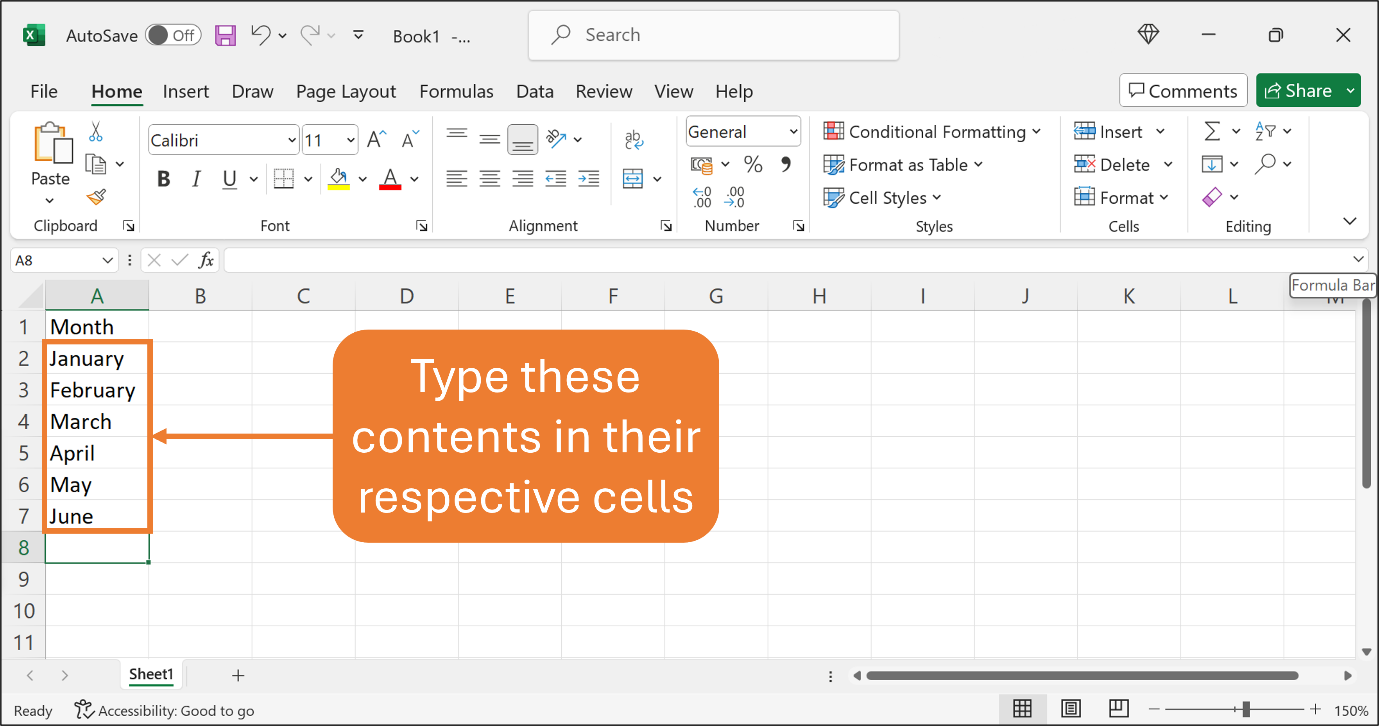
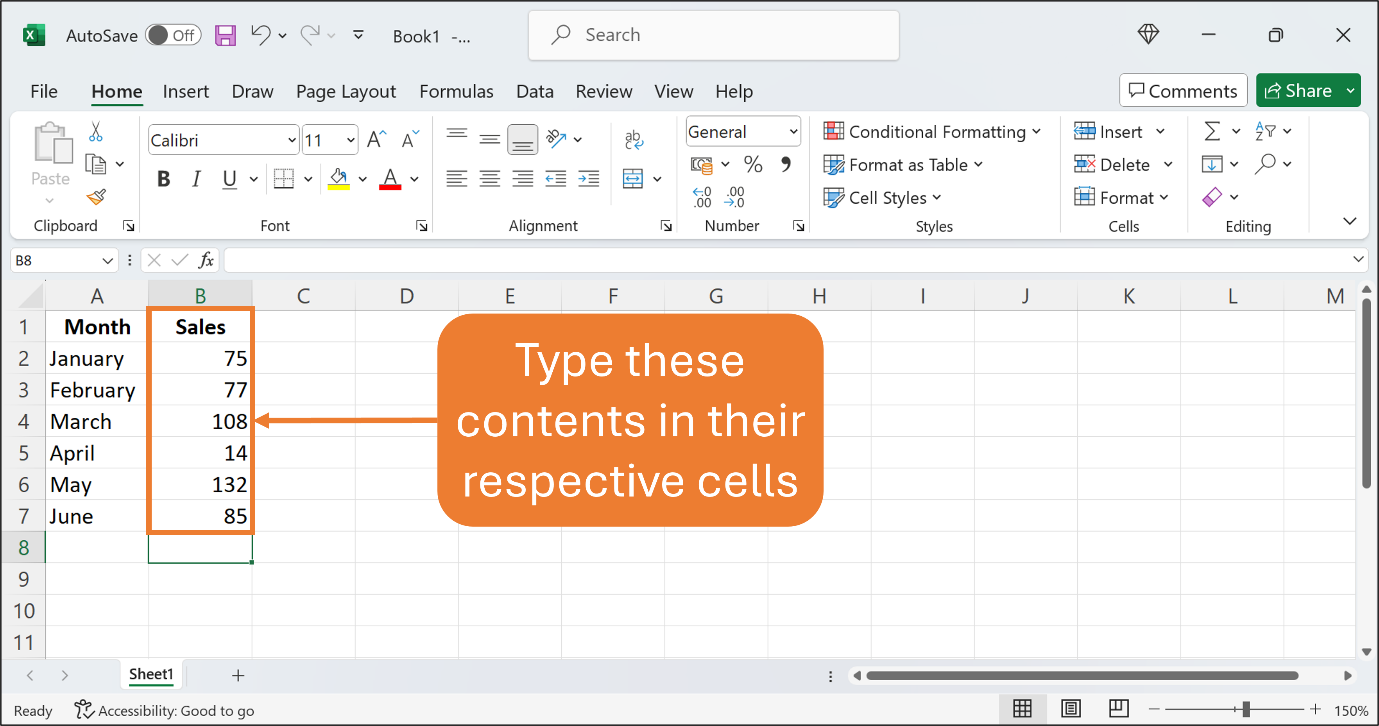
Now, type the following contents in their respective contents as shown in the Figure below.
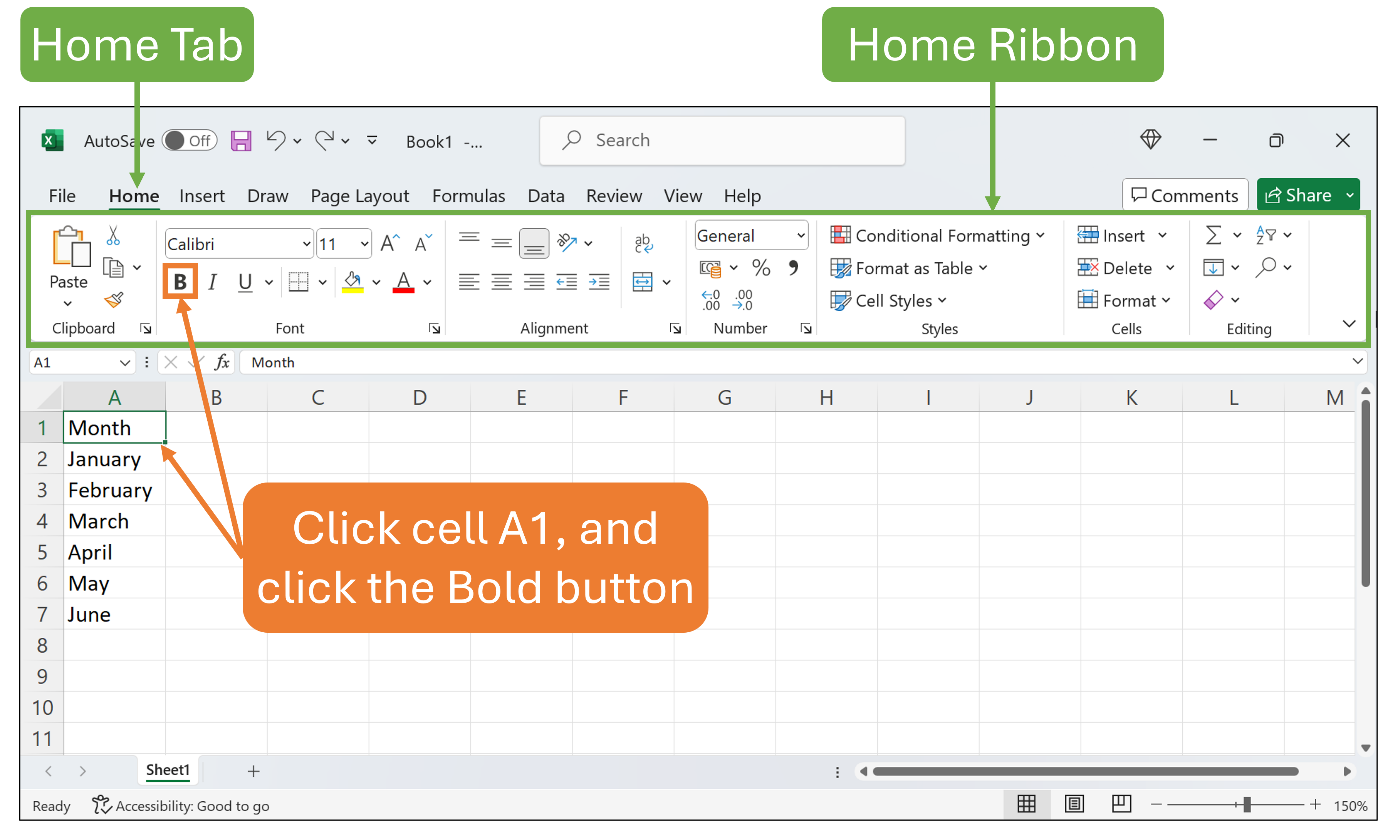
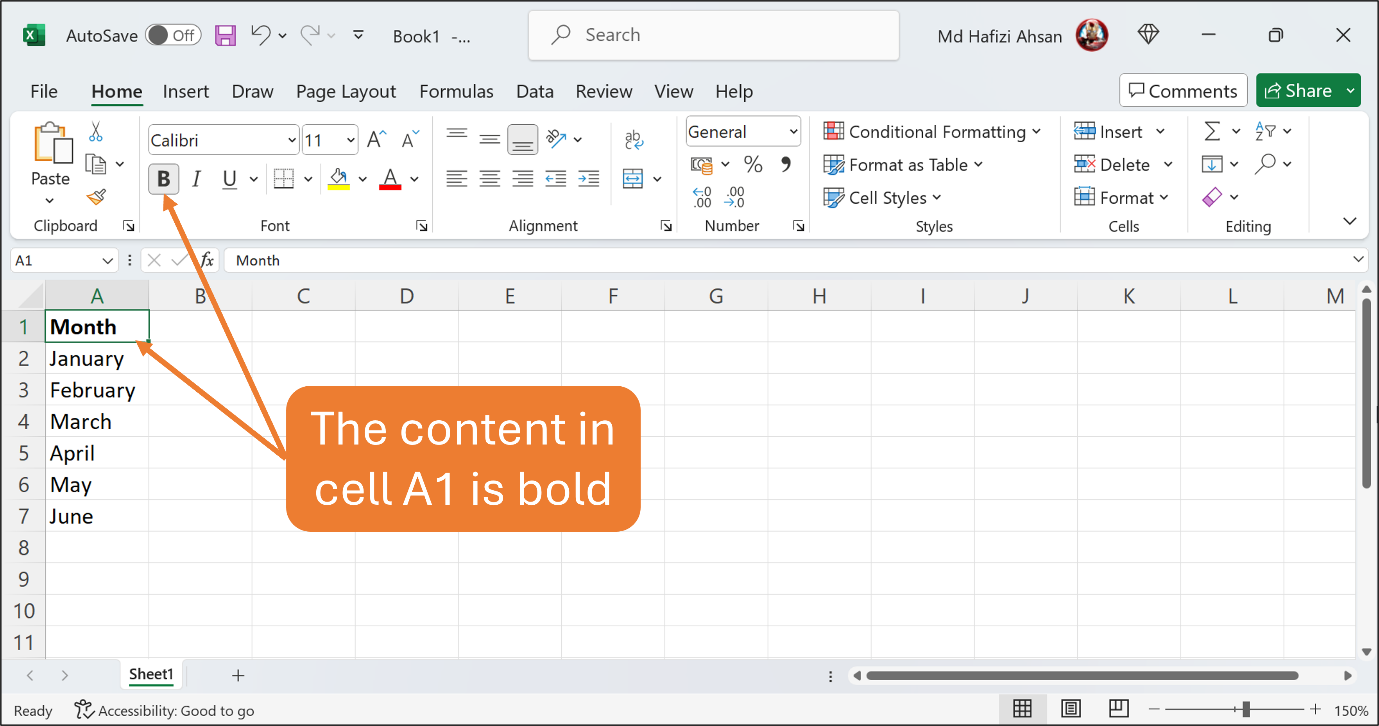
Let’s Bold the content in cell A1.
Click cell A1 to make it an active cell. Click the Home Tab to open the Home Ribbon. On the Home Ribbon, find the Bold button which is in the Font group. Click the Bold button.
See the Figures below.
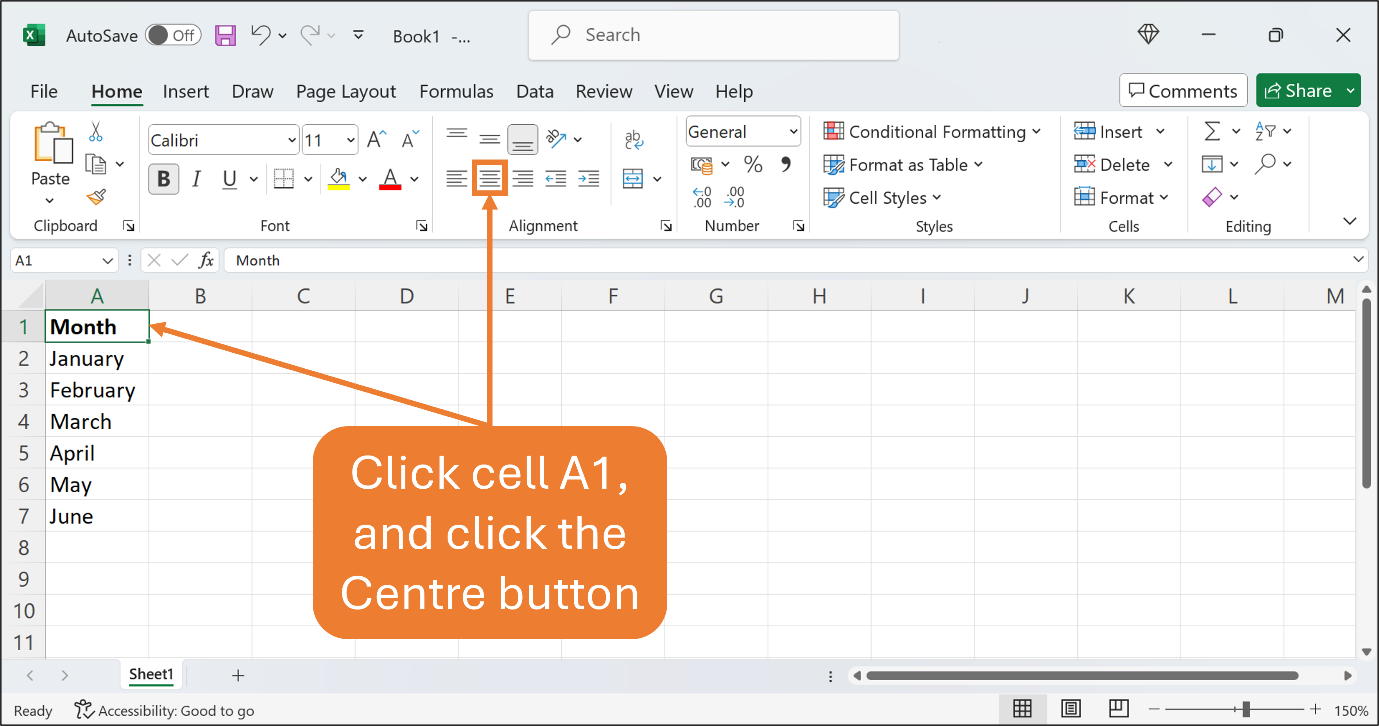
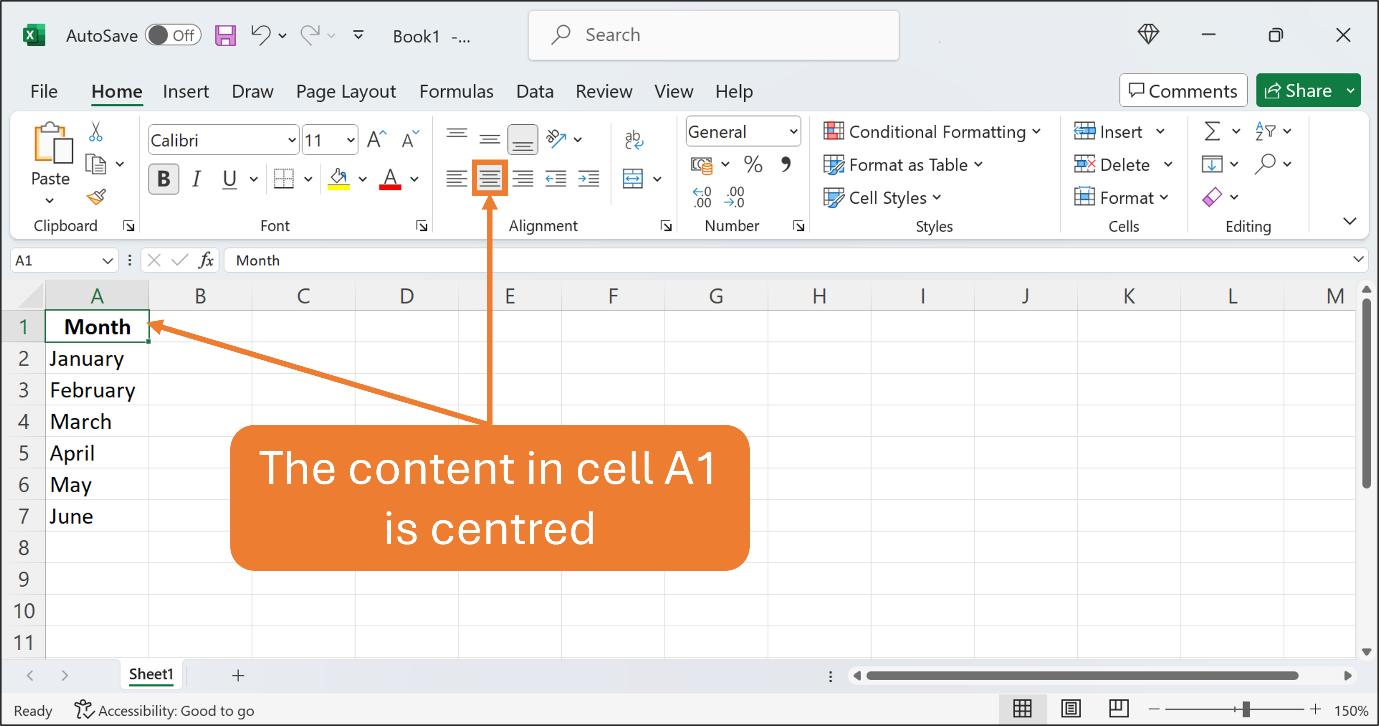
Now, let’s centre the content in cell A1. Make sure cell A1 is an active cell. On the Home Ribbon, find the Centre button which is in the Alignment group. Click the Centre button.
See the Figures below.
Let’s add more content. Bold and centre only the content in cell B1.
See the Figure below.
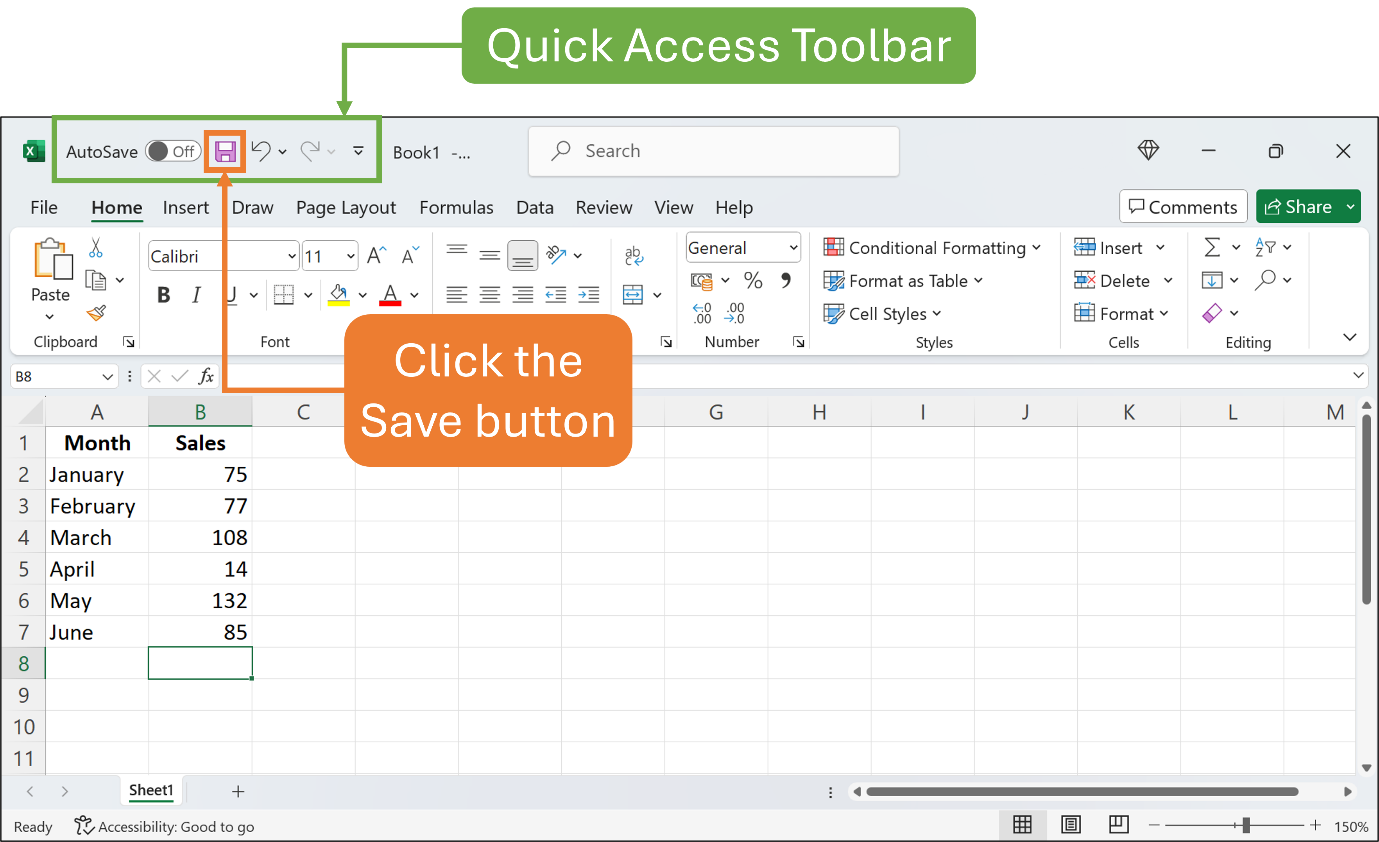
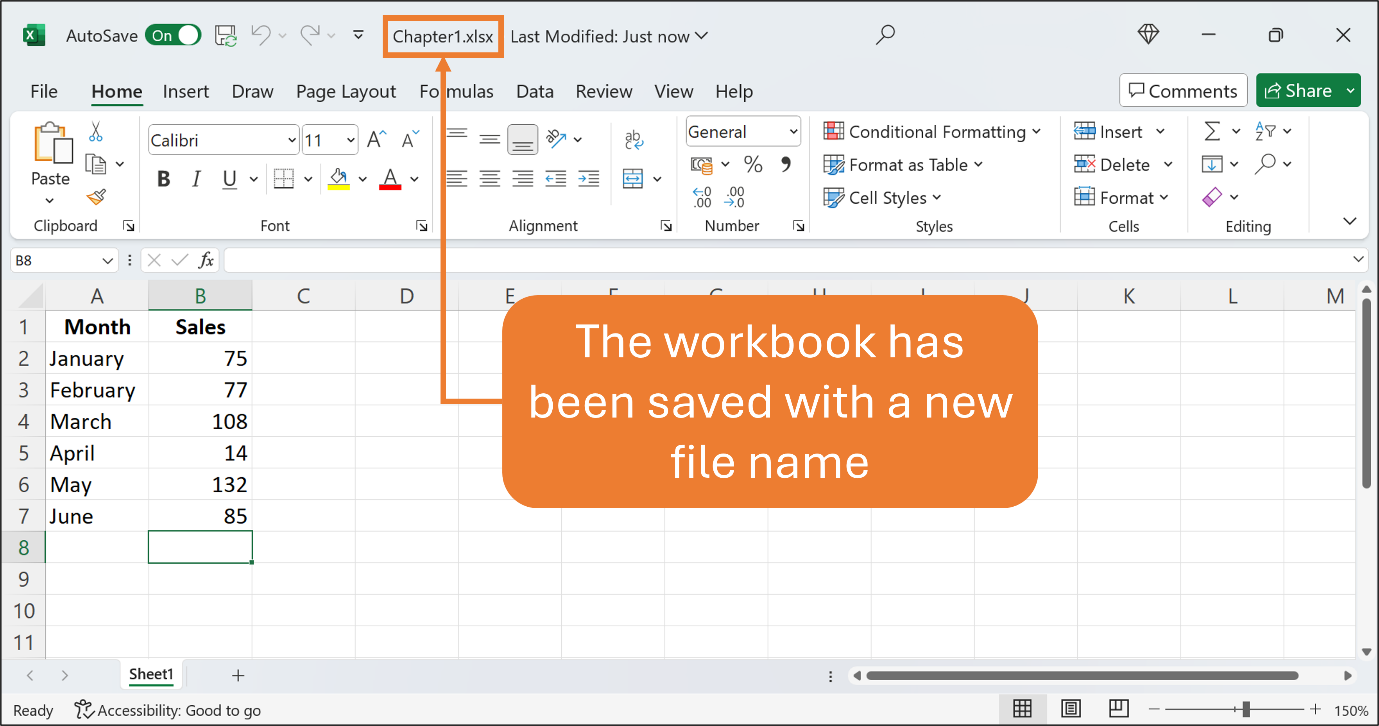
Now it’s time to save your work to a file on your hard drive.
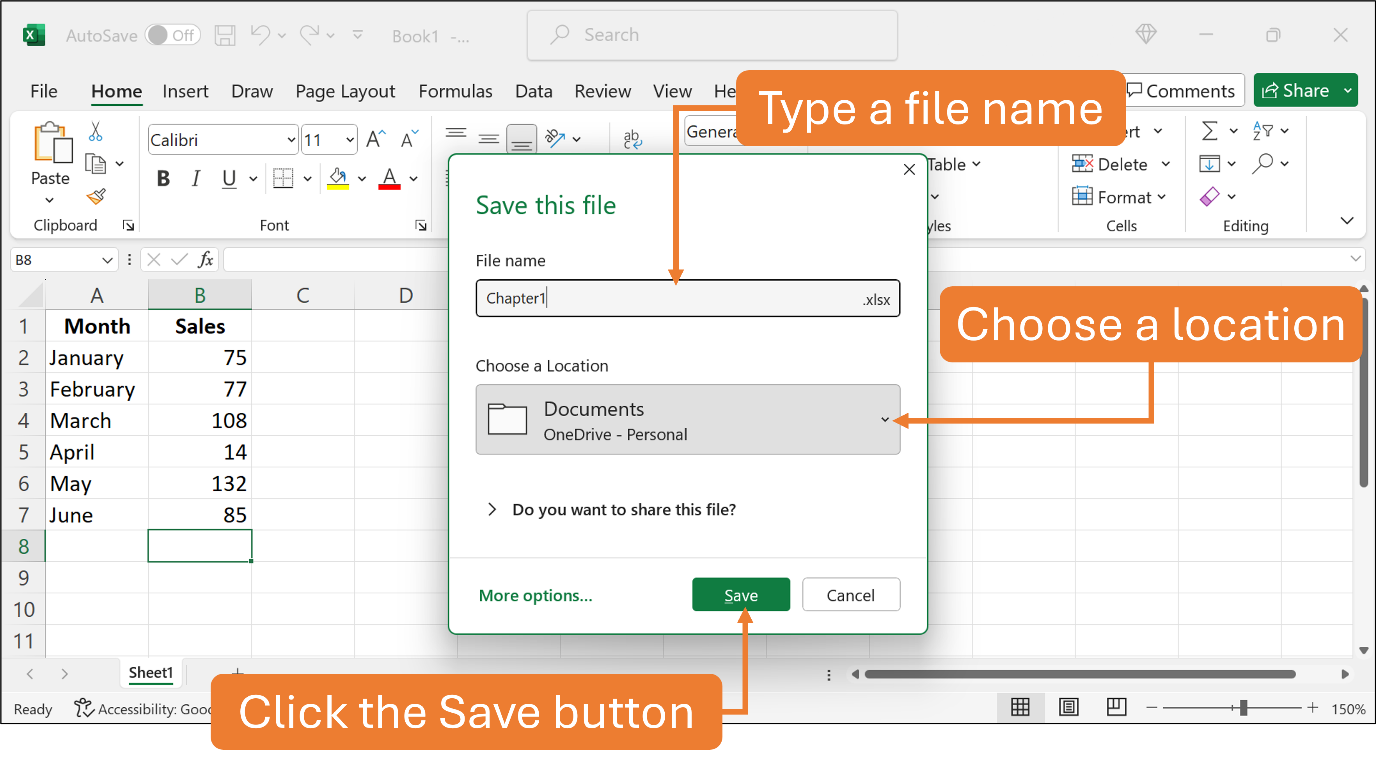
To save your work, click the Save button on the Quick Access Toolbar. Excel then gives you a Dialog Box to type a new file name and choose your preferred location. Then, click the Save button. The new file name should appear in the Title Bar.
See the Figures below.
That’s all for this Chapter.
You’re awesome!
An application software, application, program, or simply app for a small application is a computer program designed to carry out a specific task other than the operation of the computer itself, such as word processors, graphic editors, and web browsers.
Microsoft 365 is suite of productivity software, collaboration and cloud-based services owned by Microsoft. It was formerly called Microsoft Office which include applications such as Word, Excel, PowerPoint, and Outlook.
A workbook is a spreadsheet program file that you create in Excel.
Excel lets you create spreadsheets with multiple pages. Each page is called a worksheet. A collection of one or more worksheets is called a workbook (which is also sometimes called a spreadsheet file).
A column in an Excel worksheet file runs vertically across a worksheet's grid structure. Columns are labeled by capital letters known as column headings. There are 16,384 columns in Excel.
A row in an Excel worksheet file runs horizontally across a worksheet's grid structure. Rows are labeled by numbers known as row headings. There are 1,048,576 rows in Excel.
Each cell has a unique cell address, identified by first its column letter and then its row number. For xample, the cell at the intersection of column A and row 9 is cell A9.
The active cell is the current cell. Excel displays a dark border around the active cell in the worksheet window, and the cell address of the active cell appears in the Name Box.
The ribbon is a set of toolbars at the top of the window in Office programs such as Word or Excel designed to help you quickly find the commands that you need to complete a task. On Excel, you will find Home, Insert and Formulas ribbons.
