Chapter 10: Printing
Learning Objectives
- Insert header and footer.
- Set print area.
- Print a worksheet.
In this last chapter, you will learn how to insert a header and footer to a worksheet, set the print area, and print a worksheet.
You can add or edit a header or footer to a worksheet. For example, you can create a header that has your company’s name and a footer that has page numbers, the date, and the name of your workbook.
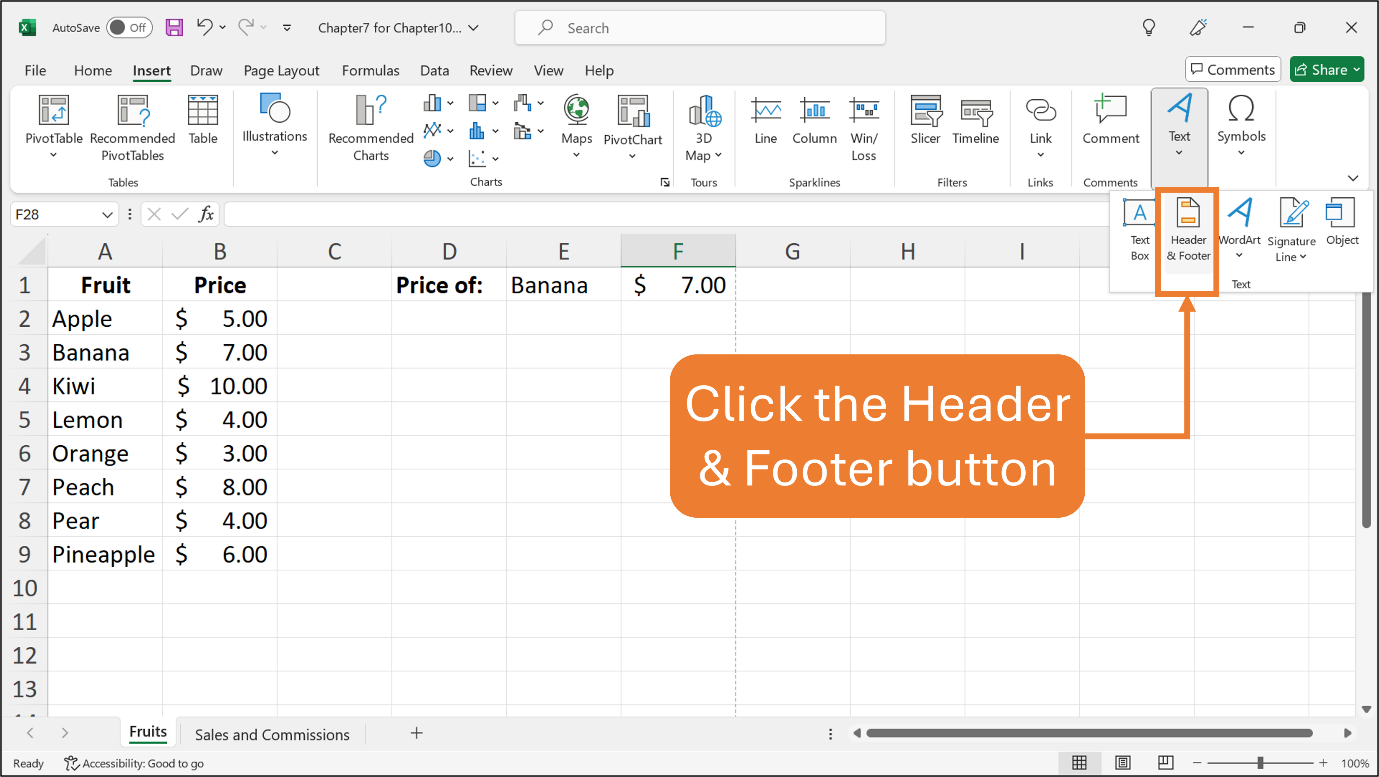
Let’s open a workbook from Chapter 7, and open a worksheet called Fruits. To insert a header or a footer to this worksheet, click the Insert tab, then click the Text button and the Header & Footer button. See the Figure below.
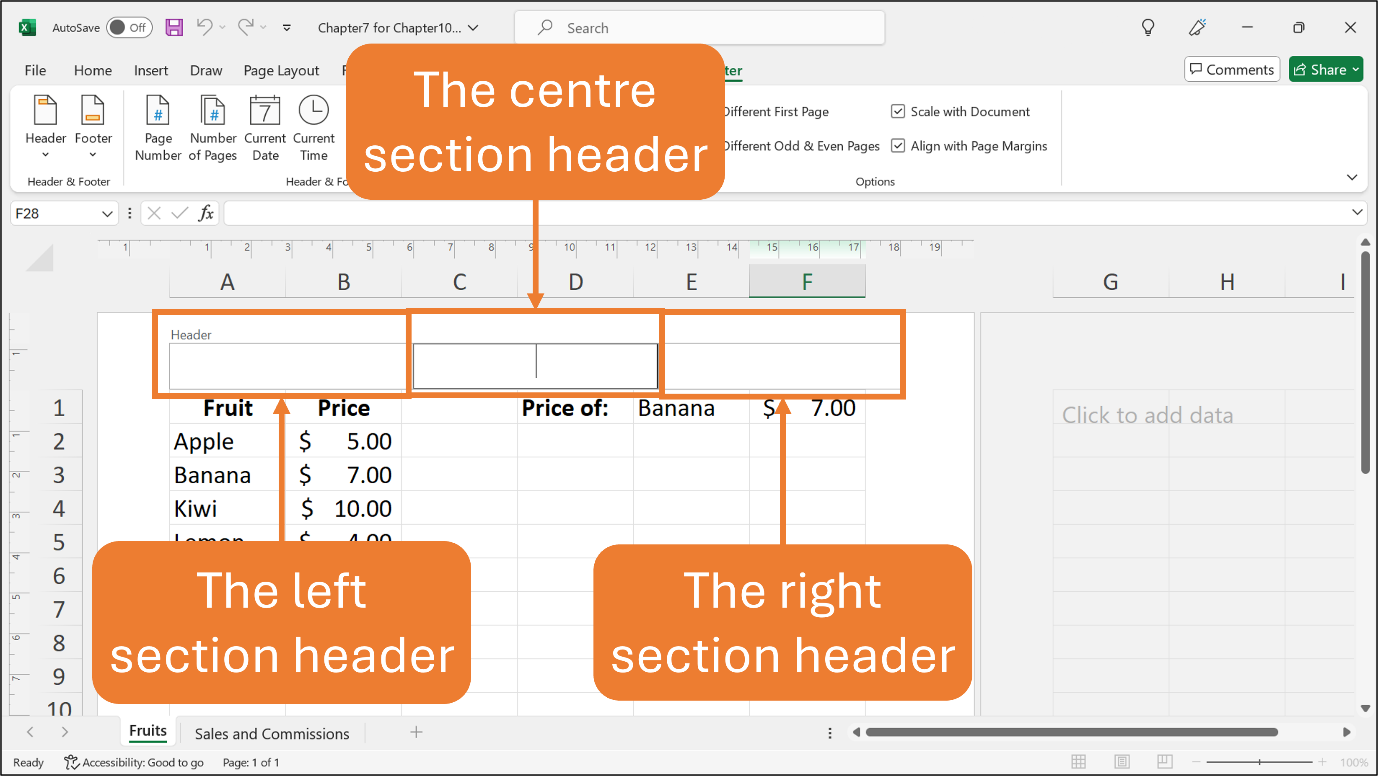
Immediately after you click the Header and Footer button, you will get a different worksheet view. This view is called a Page Layout view. The header is located at the top of the worksheet, and it has three sections, the left section, the centre section, and the right section. You can click and type in any of the sections to add the header. See the Figure below.
If you scroll down until the bottom of the worksheet, you will see the footer. It also has three sections like the footer. See the Figure below.
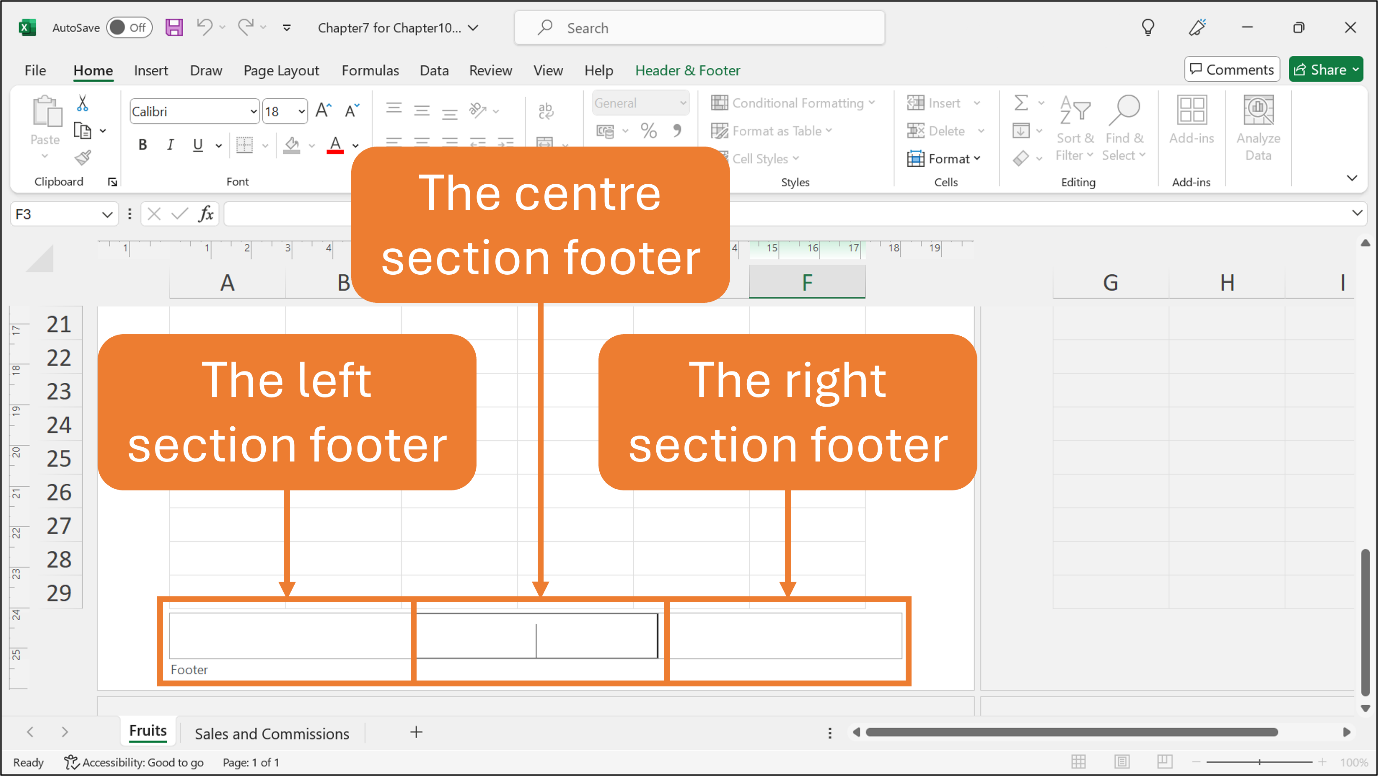
To type text in either the header or footer, you can just click on any of the sections and then type your text.
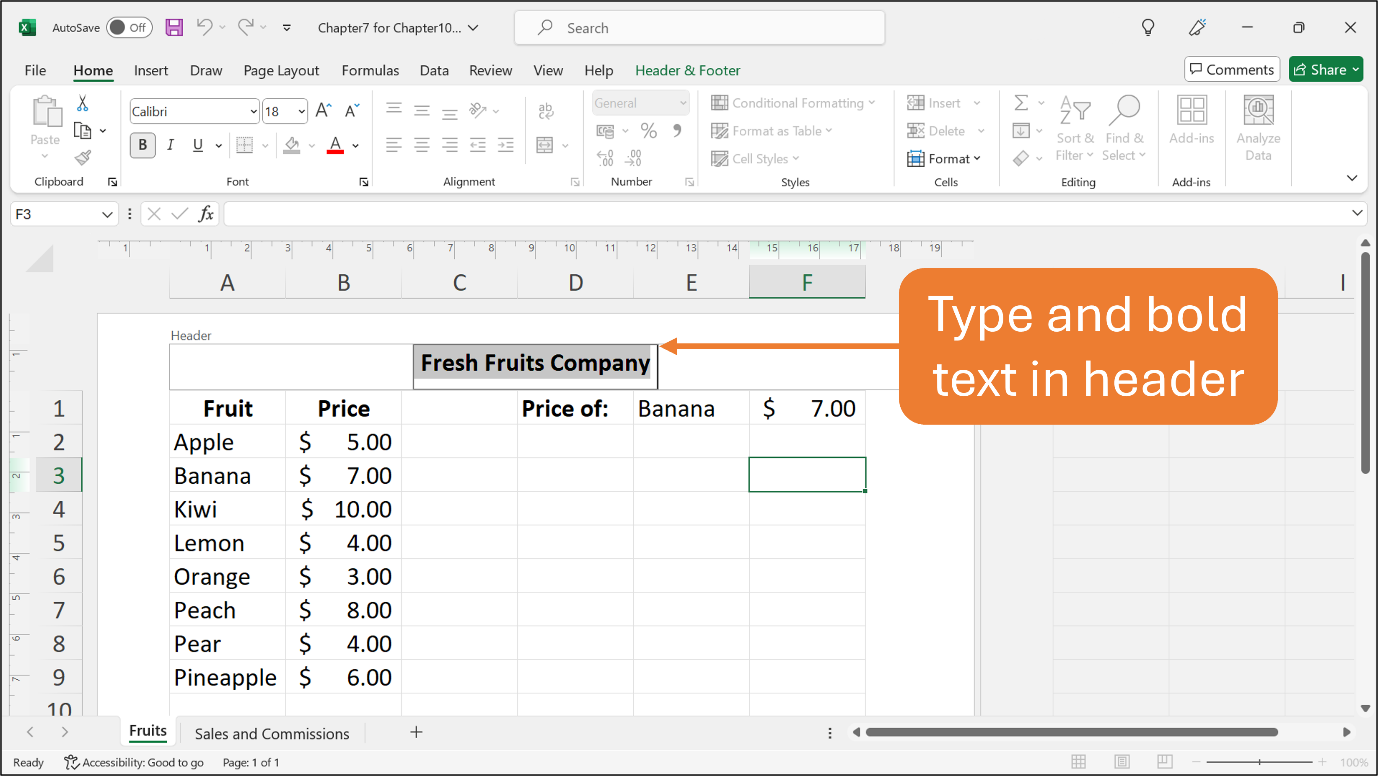
Let’s type the company name, Fresh Fruits Company in the centre section of the header. Then, select the text and click the Bold button on the Home ribbon to bold it. Alternatively, you can select the text and press Ctrl + B shortcut keys. See the Figure below.
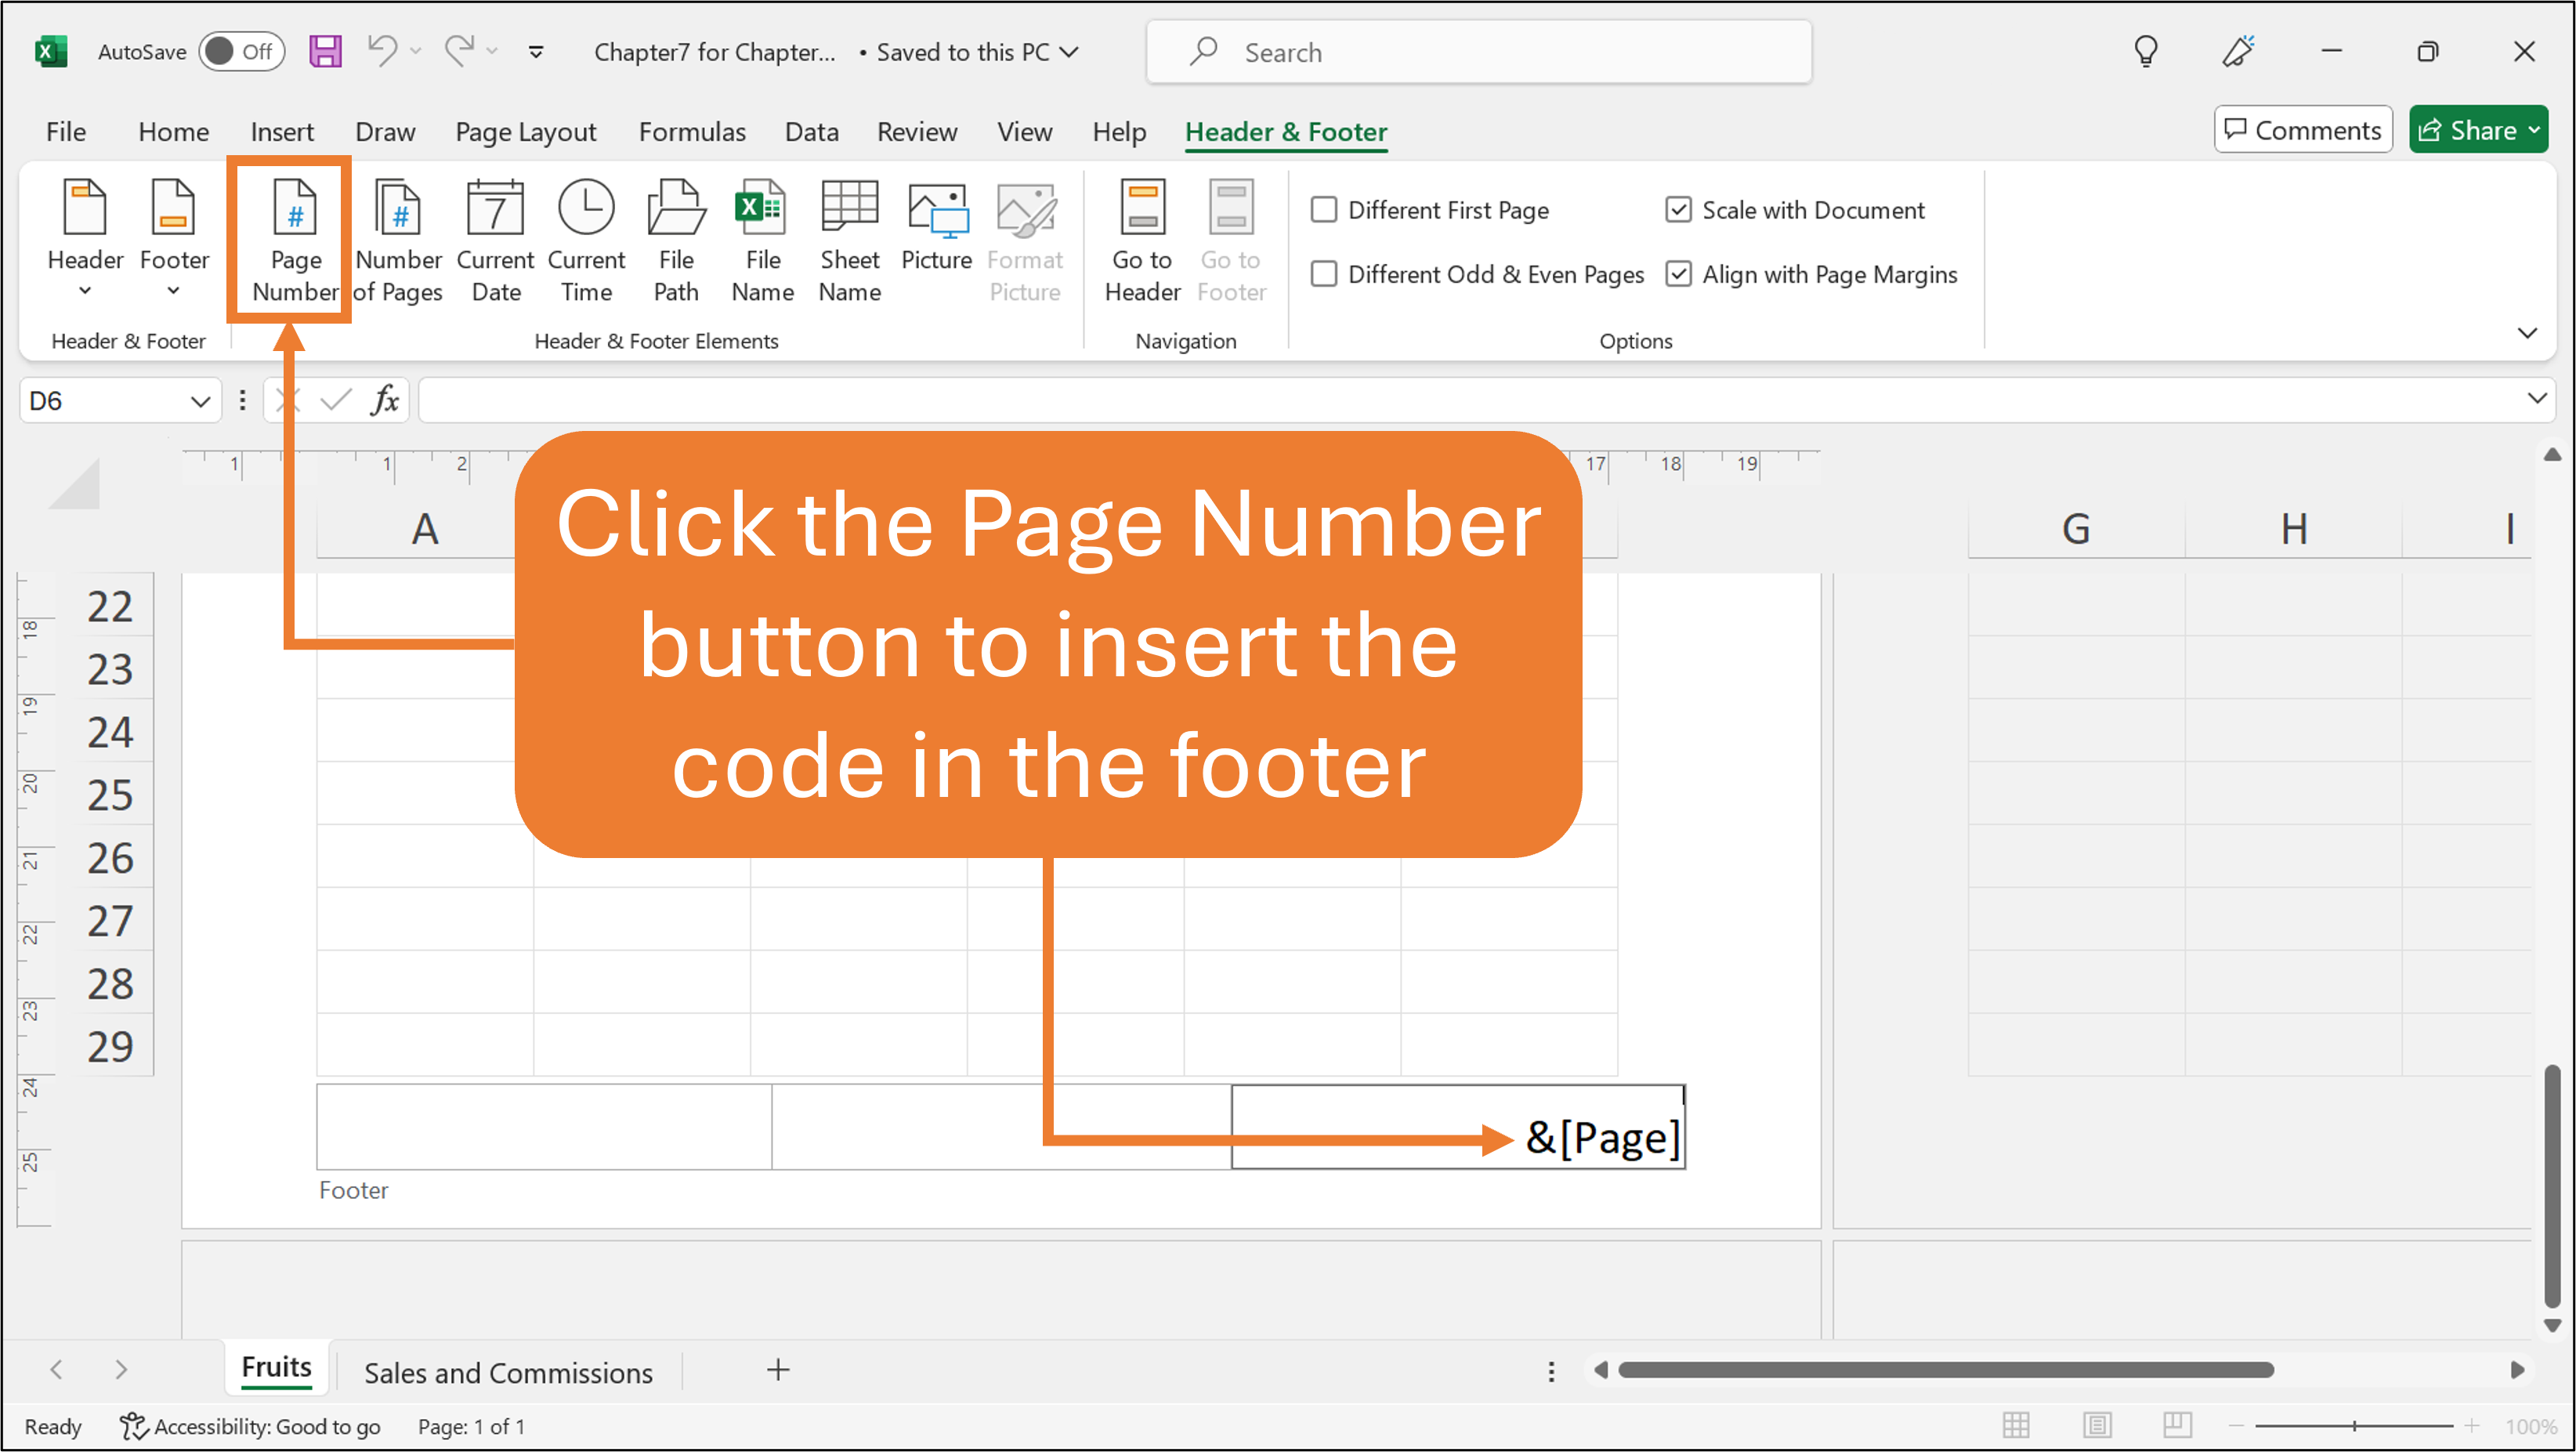
Now, let’s insert the page number at the footer. Click the right section of the footer and click the Page Number button to insert the page number code. See the Figure below.
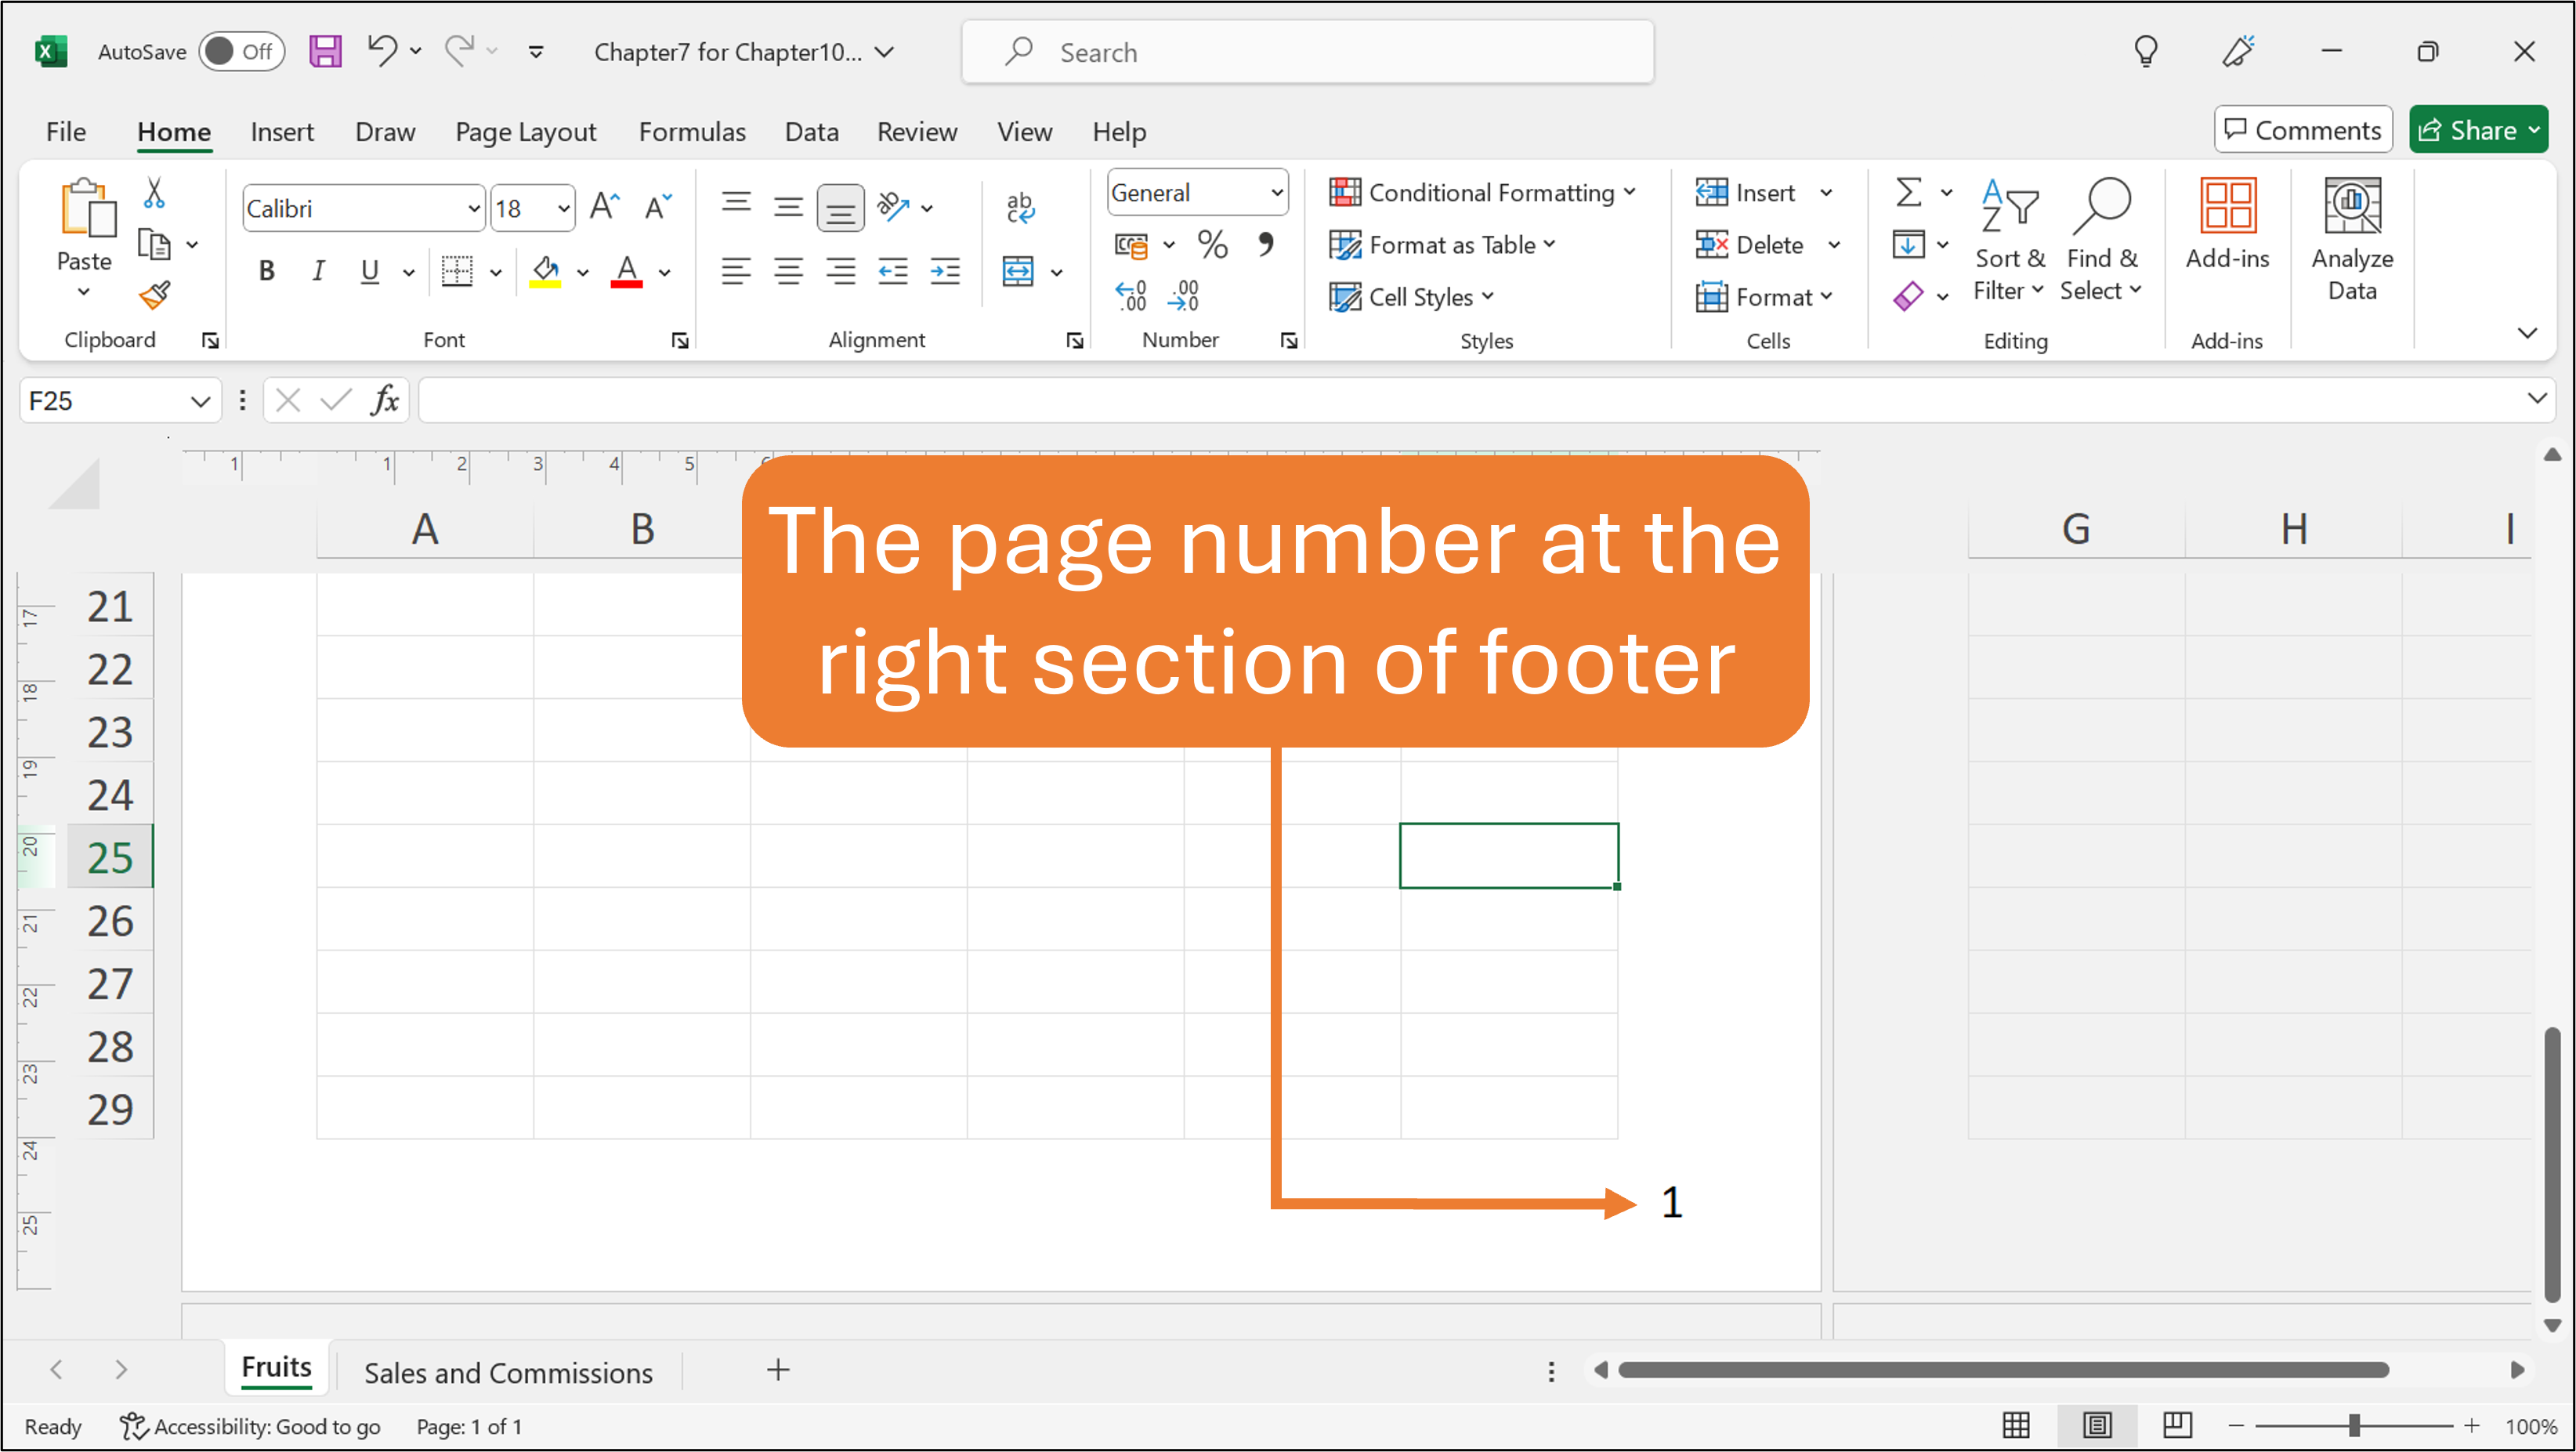
The page number code will change to a page number if you move outside the footer by clicking at the worksheet area. See the Figure below.
Now, let’s learn how to set the print area. This is to make sure that we print out only an area that we have selected in the worksheet.
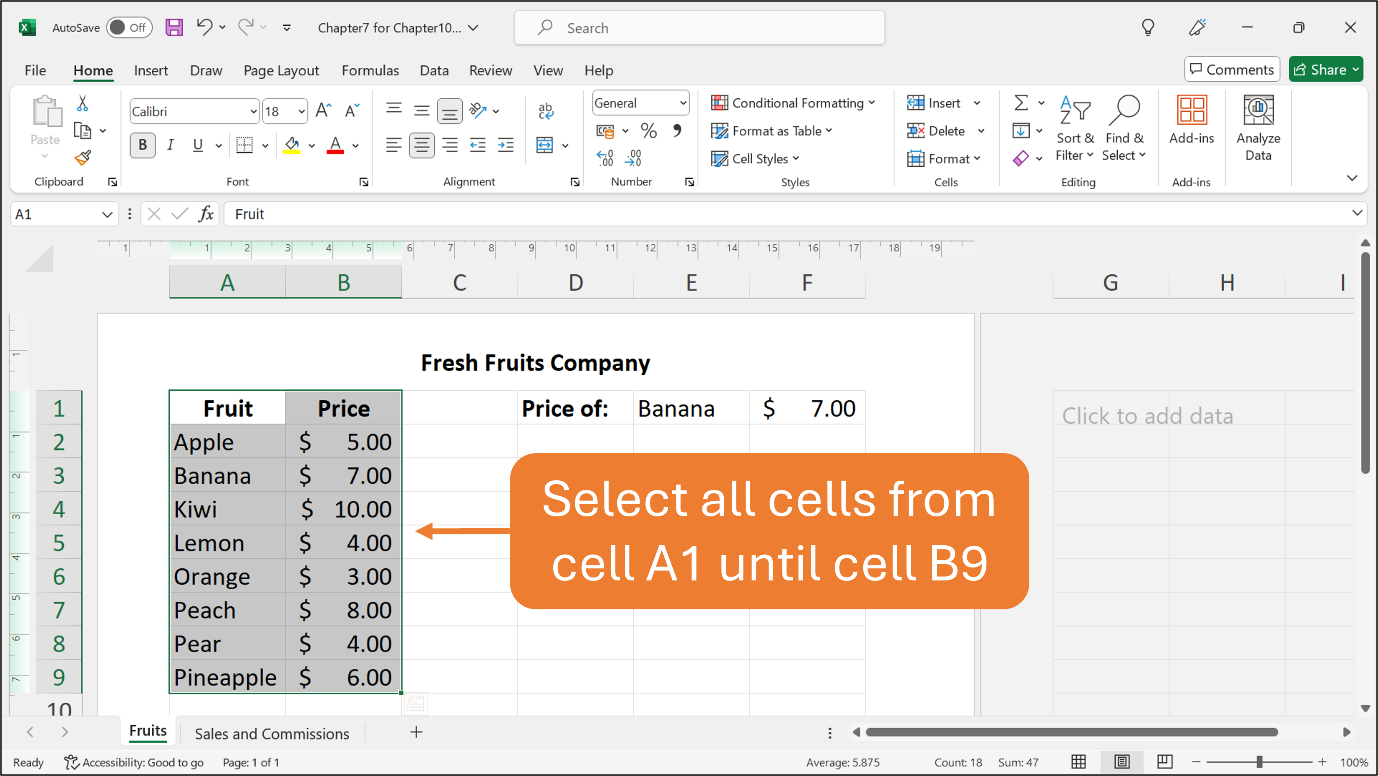
Scroll up until the top of the worksheet and select all cells from cell A1 and cell B9. Say, this is the area that you want to print out, so exclude the other data in the worksheet. See the Figure below.
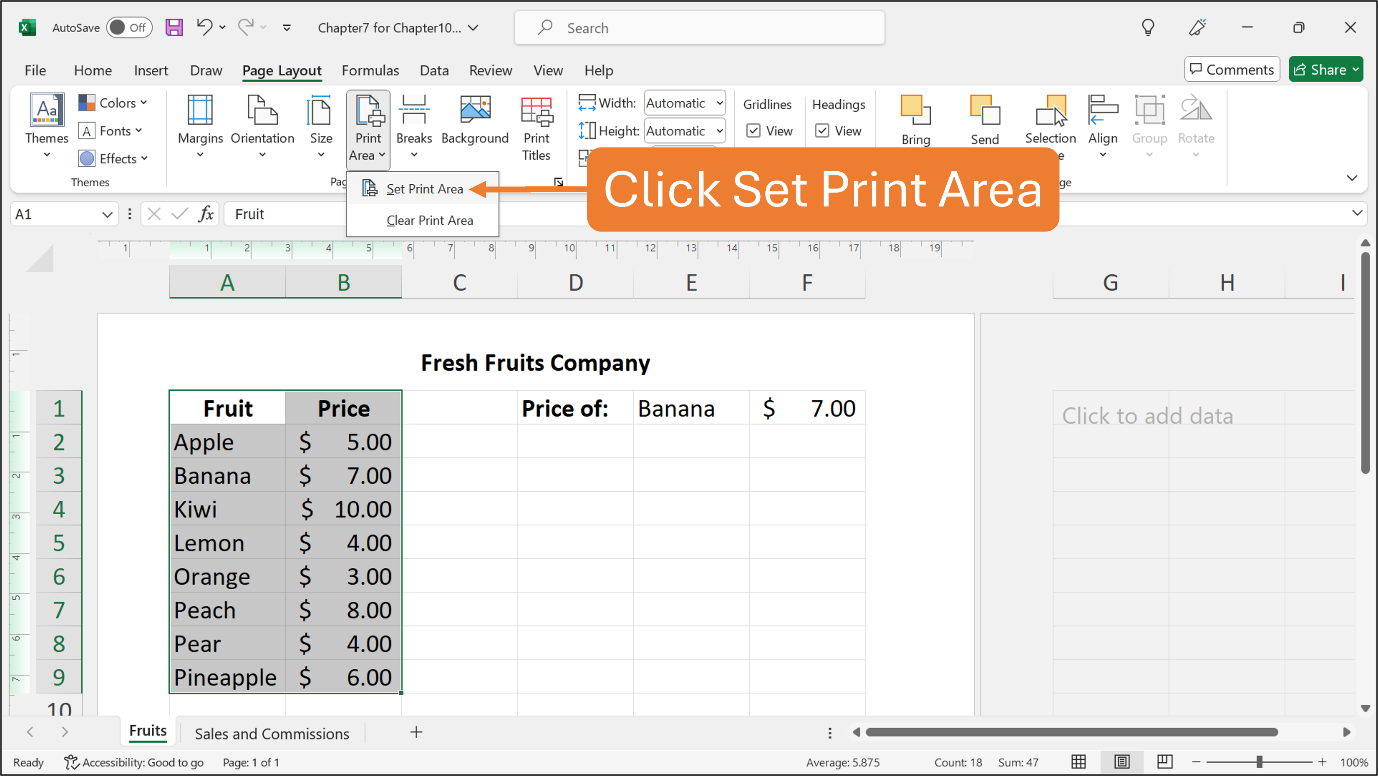
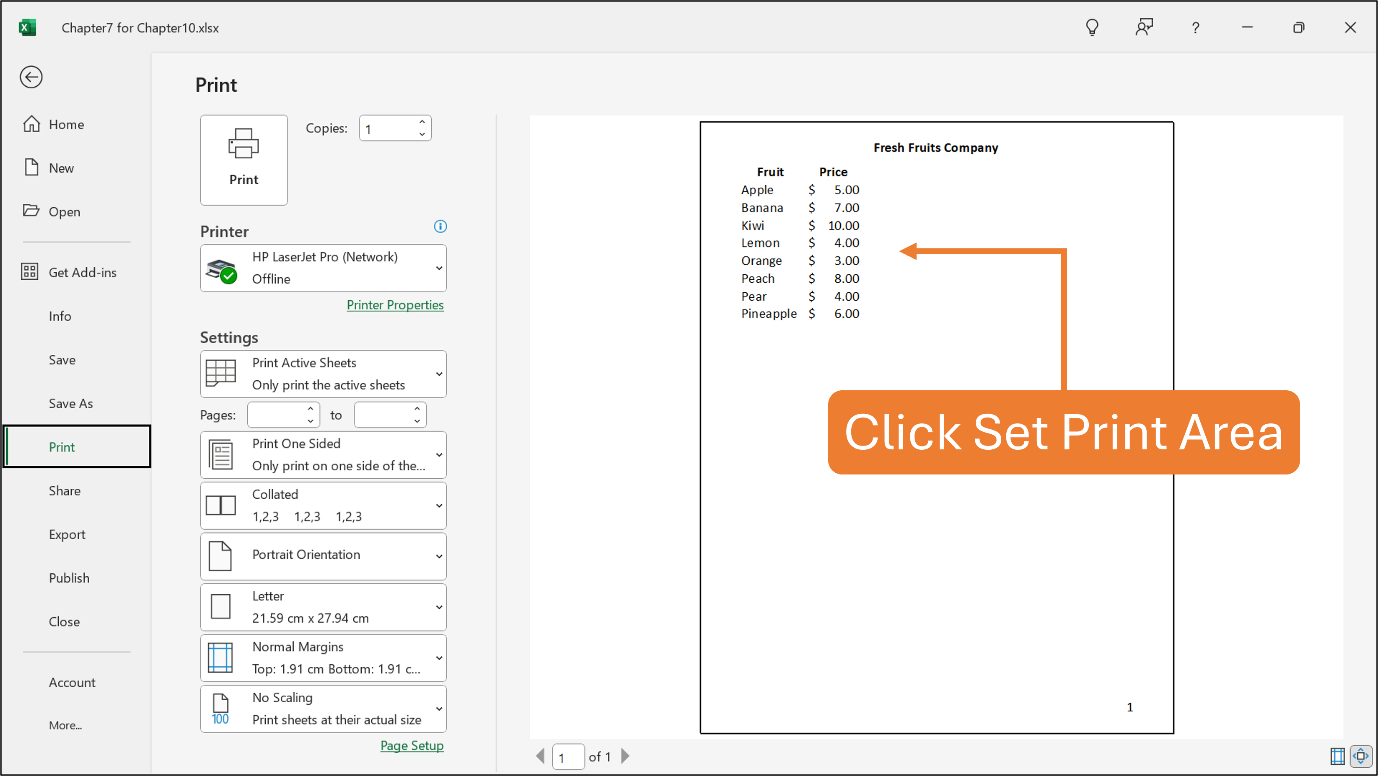
While the above cells are selected, click Set Print Area located on the Page Layout ribbon. See the Figure below.
To print out the worksheet, click the File tab and Excel brings you to the new screen called the Backstage. Here you will see the preview of the worksheet. See the Figure below.
To print the worksheet, just click the Print button.
That’s all for this Chapter.
You’re awesome!
